Hello from Nginx!
Your Nginx server is running successfully inside a Docker container managed by Docker Compose.
```
::
成功后,访问 `http://your_ipv4_address`,看到页面就成功了!
## Cloudflare 配置
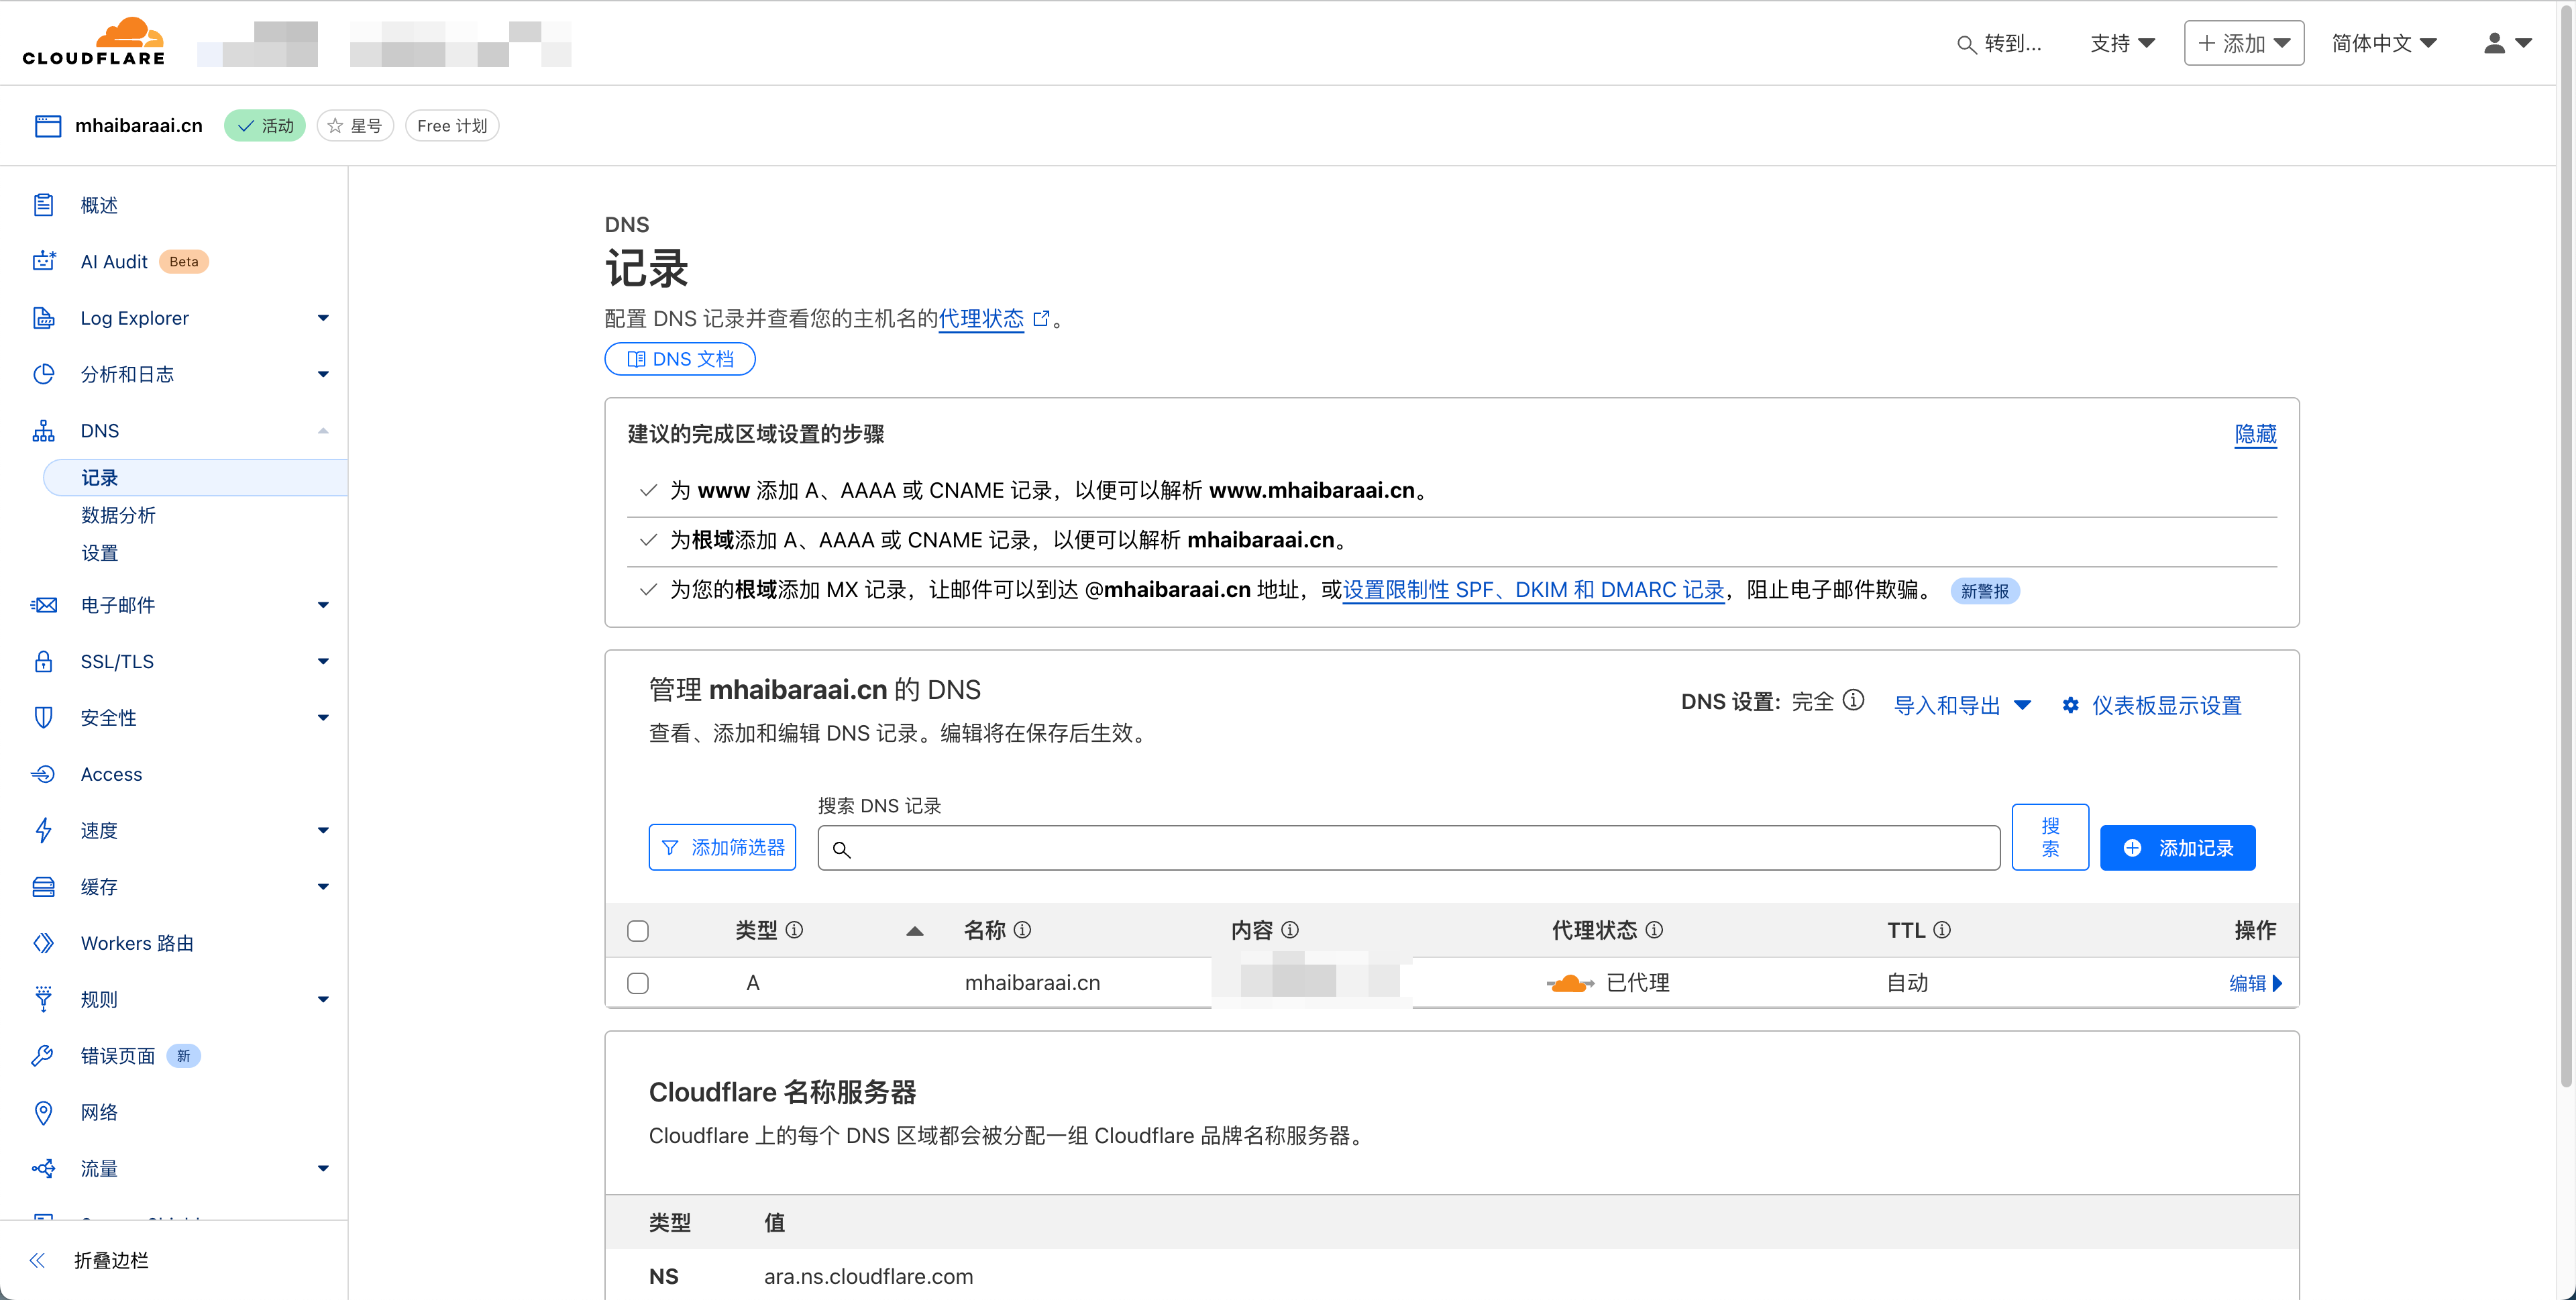
### 添加 DNS 记录
在 Cloudflare 中添加 DNS 记录,例如:添加一条 `example.com` 的 A 记录,记录值为 IP 地址 `your_ipv4_address`。
### SSL 证书创建
::steps{level="4"}
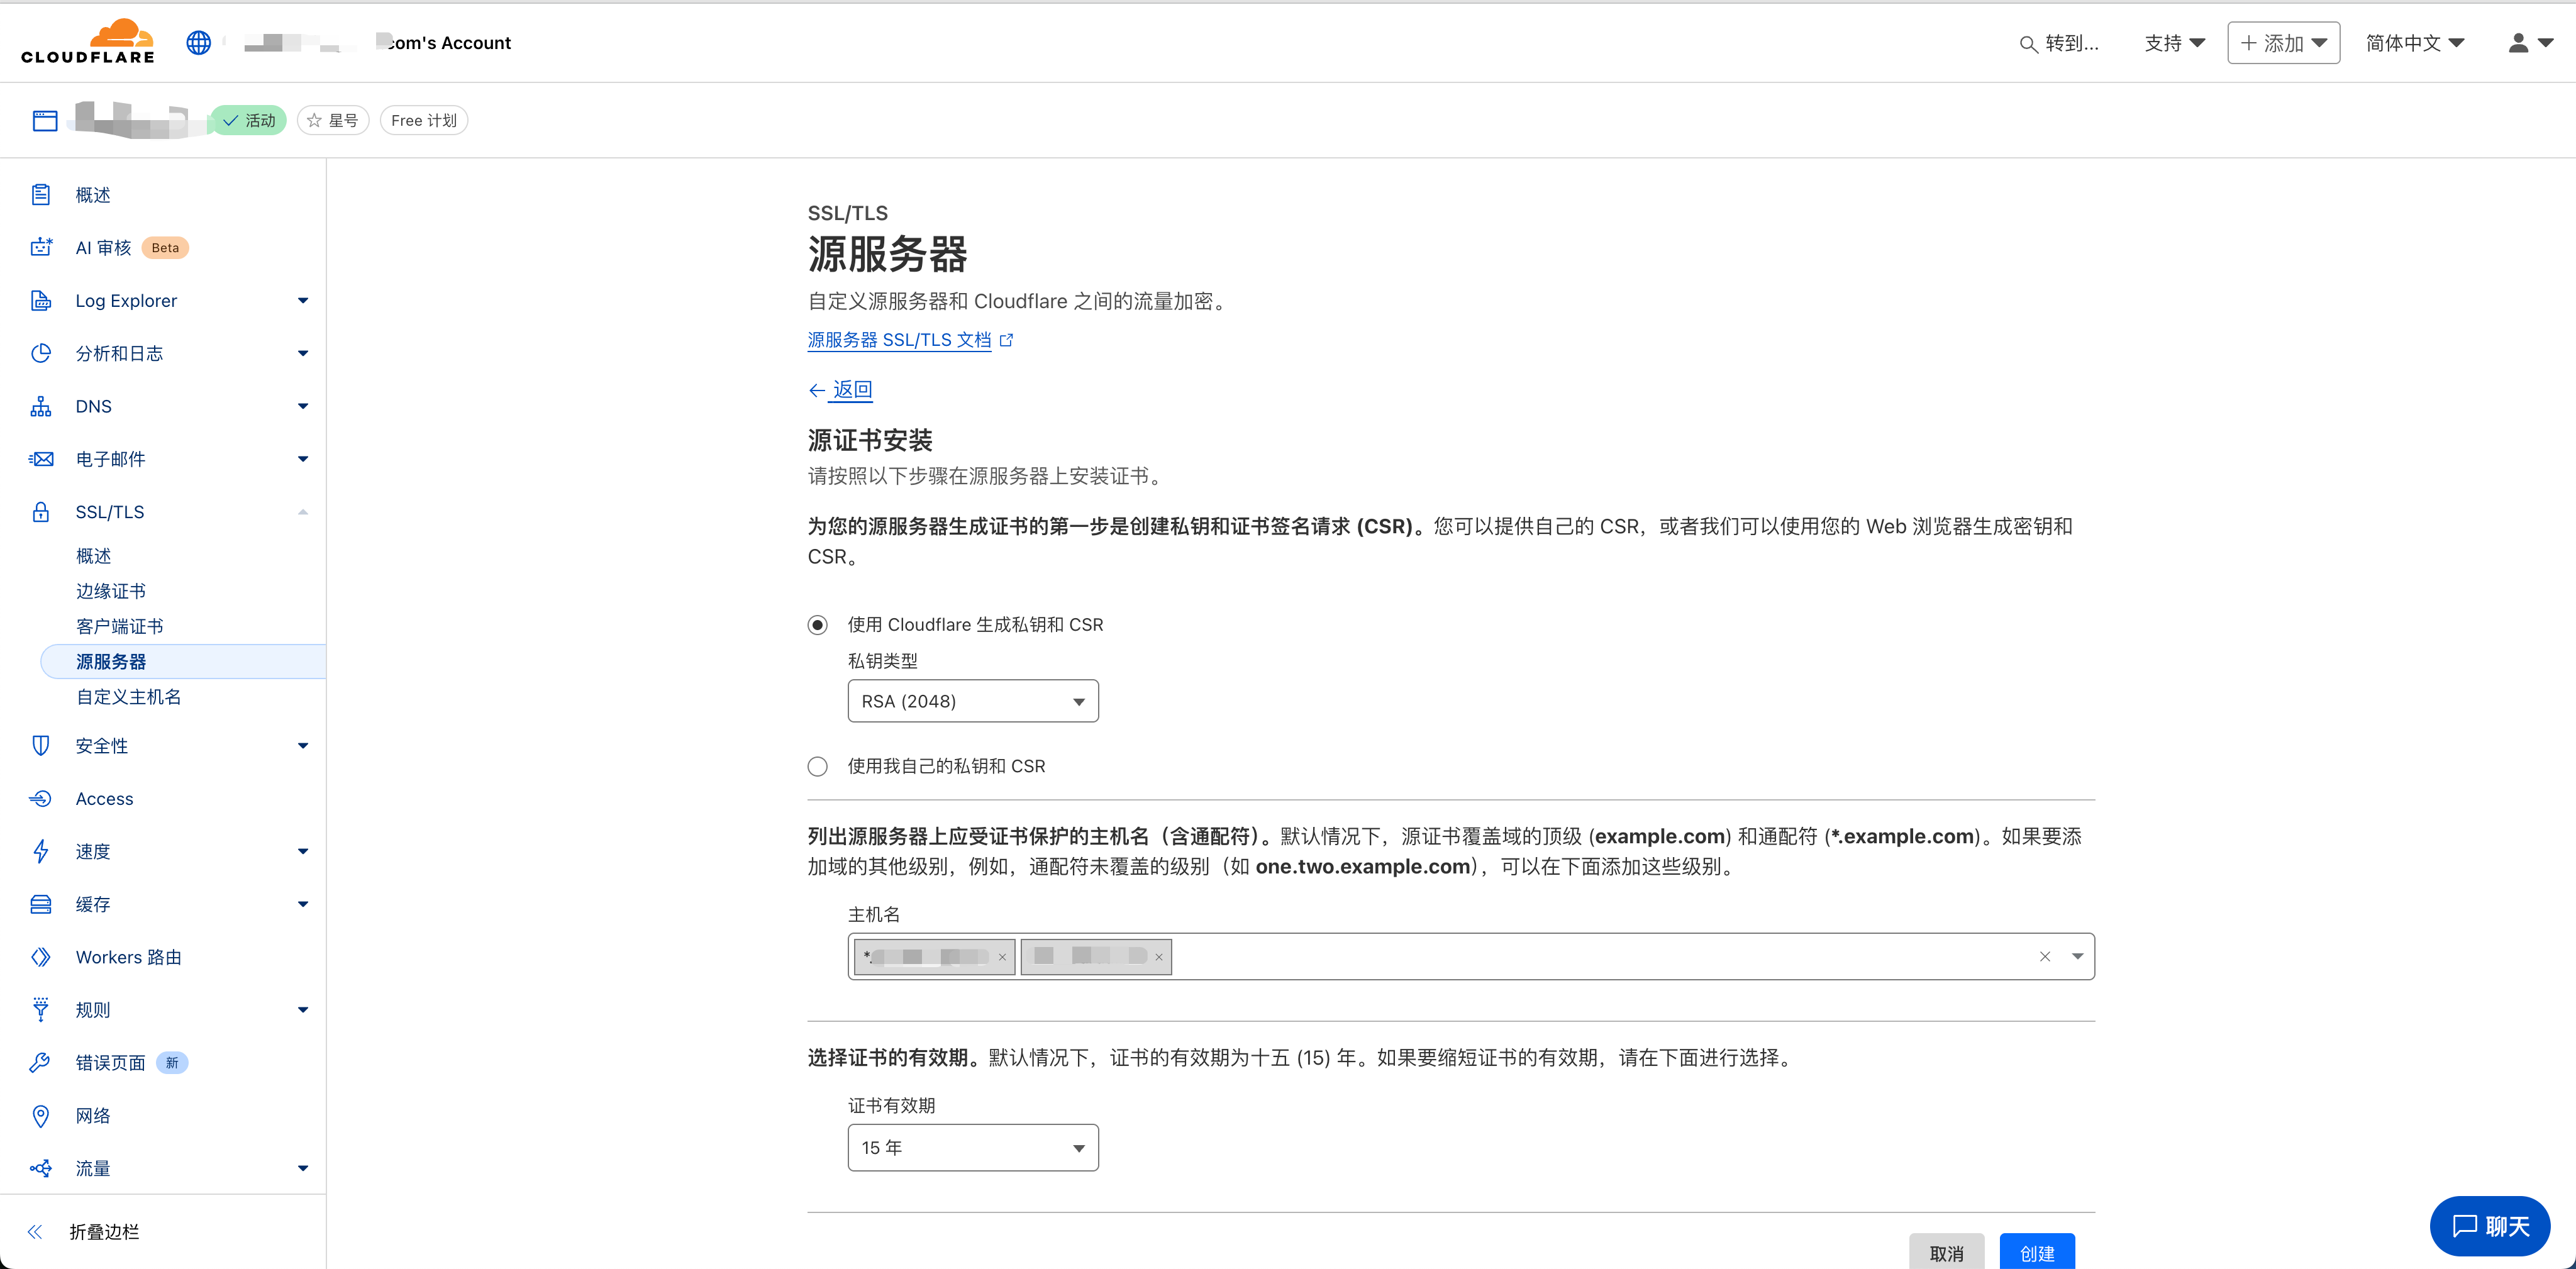
#### 在 Cloudflare 仪表板创建证书
1. 登录 Cloudflare,进入 `example.com` 的管理页面
2. 点击左侧菜单的 "SSL/TLS" -> "源服务器" (Origin Server)
3. 点击 "创建证书" (Create Certificate)
4. 保持默认选项("由 Cloudflare 生成私钥和 CSR"),主机名列表里应该已经包含了 `*.example.com` 和 `example.com`
5. 点击 "创建"
#### 复制并保存证书和私钥
Cloudflare 会立即显示两个文本框:
- 源证书 (Origin Certificate)
- 私钥 (Private Key)
#### 在服务器上存放证书文件
在服务器上创建证书存储目录:
```sh [sh]
mkdir -p /etc/ssl
```
#### 更新配置文件
:::code-group
```yaml [docker-compose.yml]
services:
nginx:
image: nginx:latest
container_name: my-nginx
ports:
- '80:80'
- '443:443'
volumes:
- ./nginx/default.conf:/etc/nginx/conf.d/default.conf:ro
- ./html:/usr/share/nginx/html:ro
- ./etc/ssl:/etc/ssl:ro # 添加这一行,指向您存放证书的目录
extra_hosts:
- "host.docker.internal:host-gateway" # 添加这一行,用于容器内访问宿主机端口
restart: unless-stopped
```
```conf [nginx/default.conf]
server {
listen 80;
server_name example.com;
return 301 https://$host$request_uri;
}
server {
listen 443 ssl http2;
server_name example.com;
ssl_certificate /etc/ssl/example.com.pem;
ssl_certificate_key /etc/ssl/example.com.key;
ssl_protocols TLSv1.2 TLSv1.3;
ssl_ciphers 'TLS_AES_128_GCM_SHA256:TLS_AES_256_GCM_SHA384:ECDHE-RSA-AES128-GCM-SHA256';
ssl_prefer_server_ciphers off;
# 启用 gzip 压缩
gzip on;
gzip_types text/plain text/css application/javascript application/json image/svg+xml;
gzip_min_length 1k;
gzip_comp_level 5;
location / {
root /usr/share/nginx/html;
index index.html index.htm;
try_files $uri /index.html;
}
}
```
:::
#### 重启 Nginx 容器
```sh [sh]
docker compose down
docker compose up -d
```
## 完整项目目录结构
完成上述所有步骤后,项目目录结构应该如下所示:
```md
~/my-nginx/
├── docker-compose.yml # Docker Compose 配置文件
├── nginx/ # Nginx 配置目录
│ └── default.conf # Nginx 服务器配置
├── html/ # 网站静态文件目录
│ ├── index.html # 首页文件
└── etc/ # 证书和配置目录
└── ssl/ # SSL 证书目录
├── example.com.pem # SSL 证书文件
└── example.com.key # SSL 私钥文件
```
::
# PostgreSQL 部署
::note
本指南使用 Docker Compose v2+ 部署 PostgreSQL。
::
::steps{level="2"}
## 创建项目结构
```sh [sh]
mkdir -p ~/postgres-server
cd ~/postgres-server
# 使用 .env 文件存储敏感凭据
touch .env
# Docker Compose v2+ 推荐使用 compose.yml
touch compose.yml
```
## 配置环境变量
将所有敏感信息(如密码、用户名)存储在 `.env` 文件中,可以避免将它们硬编码到配置文件中。
:::tip
请务必使用一个难以猜测的强密码替换 `your_very_strong_password`
:::
```env [~/postgres-server/.env]
DB_USER=postgres
DB_PASSWORD=your_very_strong_password
DB_NAME=postgres
COMPOSE_PROJECT_NAME=pg_server
```
## 编写 Compose 文件
:::code-collapse
```yaml [~/postgres-server/compose.yml]
services:
database:
image: postgres:17
container_name: ${COMPOSE_PROJECT_NAME}-db
restart: unless-stopped
environment:
POSTGRES_USER: ${DB_USER}
POSTGRES_PASSWORD: ${DB_PASSWORD}
POSTGRES_DB: ${DB_NAME}
ports:
- '127.0.0.1:5432:5432'
volumes:
- db-data:/var/lib/postgresql/data
networks:
- default
volumes:
db-data:
name: ${COMPOSE_PROJECT_NAME}-data-volume
networks:
default:
name: ${COMPOSE_PROJECT_NAME}-network
```
:::
## 启动服务
在 `~/postgres-server` 目录下启动数据库。
```sh [sh]
docker compose up -d
```
## 验证安装
检查容器是否正在运行,并尝试连接到数据库。
```sh [sh]
docker compose ps
docker compose exec database psql -U postgres -d postgres
```
成功连接后,将看到 `postgres=>` 提示符。输入 `\q` 退出。
::
## 添加 PostGIS 支持(用于地图和地理空间操作)
如果项目需要处理地理数据(例如,存储经纬度、计算距离、处理地图瓦片),需要使用带有 PostGIS 扩展的 PostgreSQL 镜像。
```yaml [~/postgres-server/compose.yml]
services:
database:
image: postgis/postgis:17-3.4
# ... 其余配置保持不变 ...
```
重启服务使配置生效
```sh [sh]
docker compose down
docker compose up -d
```
## 在数据库中激活扩展
即使使用了 PostGIS 镜像,仍需要在目标数据库中手动激活扩展。
1. 连接到数据库
```sh [sh]
docker compose exec database psql -U postgres -d postgres
```
2. `psql` 提示符后,运行以下 SQL 命令:
```sql [sh]
-- 激活 PostGIS 核心功能
CREATE EXTENSION postgis;
-- (可选) 激活拓扑支持
CREATE EXTENSION postgis_topology;
-- (可选) 激活栅格数据支持
CREATE EXTENSION postgis_raster;
```
3. **验证安装**:br 运行 `\dx` 命令,应该能看到 `postgis` 及其他已安装的扩展。 :code-collapse[```text
postgres=> \dx
List of installed extensions
Name | Version | Schema | Description
------------------------+---------+------------+------------------------------------------------------------
fuzzystrmatch | 1.2 | public | determine similarities and distance between strings
plpgsql | 1.0 | pg_catalog | PL/pgSQL procedural language
postgis | 3.5.2 | public | PostGIS geometry and geography spatial types and functions
postgis_raster | 3.5.2 | public | PostGIS raster types and functions
postgis_tiger_geocoder | 3.5.2 | tiger | PostGIS tiger geocoder and reverse geocoder
postgis_topology | 3.5.2 | topology | PostGIS topology spatial types and functions
(6 rows)
```]
现在,PostgreSQL 数据库已完全具备处理地理空间数据的能力。
## 远程连接数据库
当需要使用 Navicat、DBeaver 或其他桌面客户端连接服务器上的数据库时,强烈推荐通过 SSH 隧道进行连接,以确保安全。
在 Navicat 中配置 SSH 隧道:
1. 打开 Navicat,新建一个 PostgreSQL 连接。
2. 在 **“常规”** 选项卡中:
- **主机**: `localhost` 或 `127.0.0.1` (连接到本地隧道)
- **端口**: `5432`
- **初始数据库**: `postgres` (或在 `.env` 中设置的 `DB_NAME`)
- **用户名**: `postgres` (或 `DB_USER`)
- **密码**: 在 `.env` 文件中设置的 `DB_PASSWORD`
3. 切换到 **“SSH”** 选项卡,勾选 **“使用 SSH 通道”**:
- **主机**: 服务器的 **公网 IP 地址** (`your_ipv4_address`)
- **端口**: `22`
- **用户名**: `root` (或用于 SSH 登录的用户名)
- **验证方法**: 选择“密码”并输入 SSH 登录密码,或者选择“公钥”并指定 SSH 私钥文件 (例如 `~/.ssh/id_ed25519`)。
4. 点击 **“连接测试”**。如果信息正确,应会提示连接成功。
# 浙政钉开发
## H5 应用 Console 调试功能
浙政钉 `H5` 应用开发中,为了方便调试,可以在页面中加入 `VConsole` 调试工具,方便查看日志、调试代码。
::tip{to="https://github.com/Tencent/vConsole/tree/master"}
vConsole 是一个轻量、可拓展、针对手机网页的前端开发者调试面板
::
::code-group
```sh [pnpm]
pnpm add vconsole
```
```sh [npm]
npm install vconsole
```
::
::code-group
```ts [pc.ts]
import VConsole from 'vconsole'
const vConsole = null
// 当鼠标按下中键时,显示vConsole,结束后销毁
document.addEventListener('keydown', (e) => {
if (e.keyCode === 123) {
if (!vConsole)
vConsole = new VConsole()
else if (vConsole)
vConsole.destroy()
}
})
```
```ts [ios-android.ts]
const vConsole = null
const pressTimer = null
function handleTouchStart() {
pressTimer = setTimeout(() => {
if (!vConsole)
vConsole = new VConsole()
else if (vConsole)
vConsole.destroy()
}, 3000) // 长按时间阈值
}
function handleTouchEnd() {
clearTimeout(pressTimer)
}
```
::
## 浙政钉应用埋点
::tip{to="https://wetx6c6wxe.feishu.cn/wiki/wikcnu9v1TpnP34dShwEyPzNife"}
浙政钉埋点文档
::
埋点需要三个参数:
- `sapp_name` :应用标识
- `bid` :`sapp_name`\_zzdpro
- `sapp_id` :应用ID(可以去浙政钉支持群咨询)、[官网查看埋点参数](https://yida-pro.ding.zj.gov.cn/alibaba/web/APP_VTZ4TZZSGZXB37IUIUM6/inst/homepage/#/REPORT-GWLBVYNV25OXGEY68AOOWR7GIXSVZ2B75HH1SLC6){rel="nofollow"}
::code-tree{expand-all default-value="app/permission.ts" expand-all=""}
```ts [app/permission.ts]
import aplus_push from './gdt_aplus'
router.beforeEach(async (to, from, next) => {
if (token) {
/** 开始埋点 */
const { meta: { title }, path, fullPath } = to
const pageId = (path.replace('/', '') || 'app').toUpperCase()
const userId = userStore.getUserInfo()?.dingId
aplus_push(pageId, title as string, fullPath, userId)
/** 结束埋点 */
}
})
```
```ts [app/gdt_aplus.ts]
// 浙政钉应用配置信息
const gdt_config = {
sapp_id: 'xxx', // 43832
sapp_name: 'xxx', // gxq_msgd01
}
/**
* 浙政钉埋点-流量分析代码(基础埋点、用户信息埋点)
* @param page_id 页面ID, 保证唯一性
* @param page_name 页面名称
* @param page_url 页面 url
* @param _user_id 用户id
* 浙政钉-H5&小程序应用采集开发手册文档:
* https://www.yuque.com/sisialing/bcg47r/ywfbnk?#YmwM5
*/
export default function aplus_queue_push(
page_id: number | string,
page_name = 'app',
page_url: string,
_user_id: number | string,
) {
/**
* 基础埋点
*/
// 单页应用或“单个页面”需异步补充PV日志参数还需进行如下埋点:
window.aplus_queue.push({
action: 'aplus.setMetaInfo',
arguments: ['aplus-waiting', 'MAN'],
})
// 单页应用路由切换后或在异步获取到pv日志所需的参数后再执行sendPV:
window.aplus_queue.push({
action: 'aplus.sendPV',
arguments: [
{
is_auto: false,
},
{
// 当前你的应用信息,此两行按应用实际参数修改,不可自定义。
sapp_id: gdt_config.sapp_id,
sapp_name: gdt_config.sapp_name,
// 自定义PV参数key-value键值对(只能是这种平铺的json,不能做多层嵌套)
page_id,
page_name,
page_url,
},
],
})
/**
* 用户信息埋点
*/
// 如采集用户信息是异步行为需要先执行这个BLOCK埋点
window.aplus_queue.push({
action: 'aplus.setMetaInfo',
arguments: ['_hold', 'BLOCK'],
})
// 用户ID
window.aplus_queue.push({
action: 'aplus.setMetaInfo',
arguments: ['_user_id', _user_id],
})
// 如采集用户信息是异步行为,需要先设置完用户信息后再执行这个START埋点
// 此时被block住的日志会携带上用户信息逐条发出
window.aplus_queue.push({
action: 'aplus.setMetaInfo',
arguments: ['_hold', 'START'],
})
}
```
```html [index.html]
```
```html [index-multi.html]